
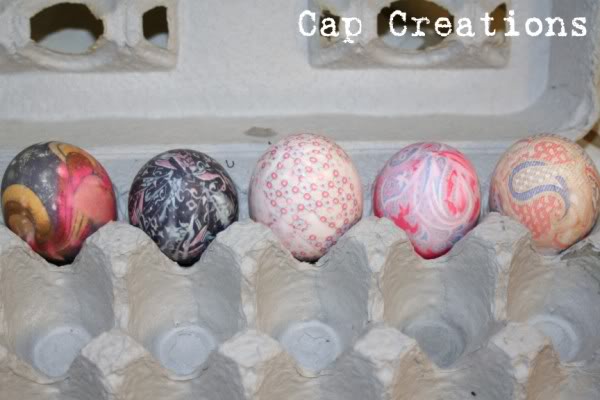
Silk Dyed Easter Eggs
I want to mention, I do not know how safe these are to eat. The dye in the ties is probably not food grade. You may not want to eat them. If anyone knows please share in the comments box. That said we do eat ours lol! If they sit out all day for decoration you might not want to eat them though.
Materials:
Glass, Enamel Pot or I use a Stainless.
White Fabric cut in pieces large enough to cover one silk wrapped egg. (washed sheet from a thrift store works)
100% Silk Material
Raw Eggs
Twist Ties
1/4 Cup White Vinegar
Water
Tongs
Vegetable Oil
1. Remove the lining from the ties and cut silk into pieces large enough to wrap around one egg.
2. Wrap raw eggs so the printed side of the silk is touching the egg and tie silk with a twist tie. Try to get the silk as smooth as possible against the egg.
3. Wrap white fabric around the silk wrapped egg an tie with another twist tie.
4. Put eggs in the pot and cover eggs completely with water and add 1/4 cup vinegar.
5. Bring to a boil, reduce heat and simmer for about 25 minutes.
6. Use tongs to remove eggs from water and let cool.
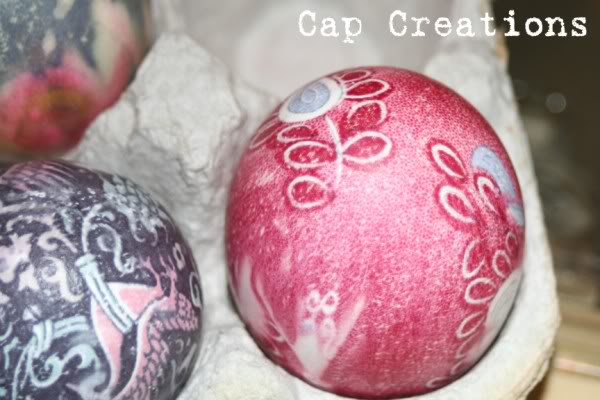
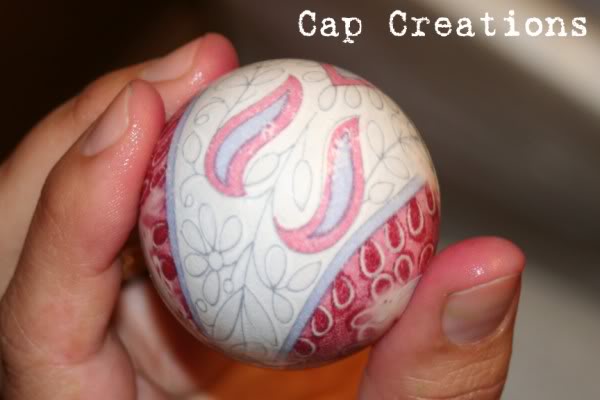
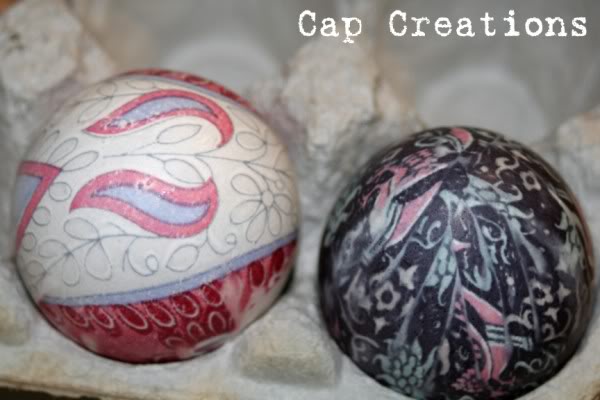
7. Remove eggs from fabric when cool enough to handle. This is the fun part! Each one is like a little present!
8. Rub a bit of vegetable oil on the eggs to add a little shine.
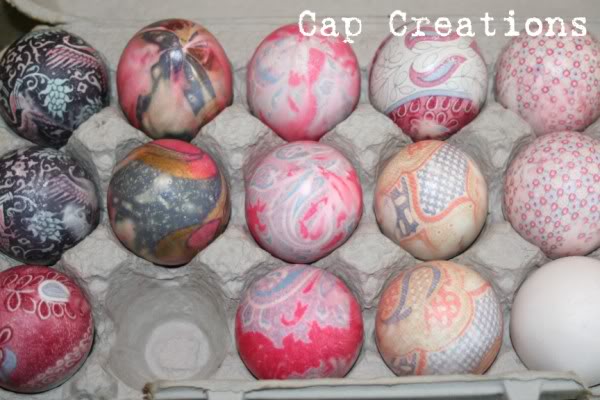
Tips - Look at thrift shops and yard sales for silk ties. The uglier the tie the prettier the egg! Bold and dark colored ties work better. It must be 100% silk or it will come out like the egg at the bottom right in the egg carton picture way below.
I hit the silk tie jack pot last May at a local, annual church rummage sale. Tons of ties and like 10¢ each! I know where I'm going every year for my ties!
The tie on the right in the photo below made my fave egg last year (the black egg in the photos above that reminds me of a tattoo). And I can't wait to see what the two on the left do this year! See Mickey peeking in the center tie?
.jpg)
.jpg)

.jpg)

.jpg)
so pretty! i actually saw a kit on Etsy but was leary about the process- i'm going to order- it sounds easy enough and they look GORGEOUS!!
ReplyDeleteI ate mine last year and didn't die, but I left them in the fridge after dying them =)
ReplyDeleteSuch a great idea!!!
ReplyDeleteCome and visit my Easter Decor Inspiration Party here...
http://growingourowngarden.blogspot.com/2010/03/easter-decor-inspiration-linky.html
I am going to feature this as part of my Spring has Sprung Party. Come by and snag a button. These turned out fabulous!!
ReplyDeleteI just tried this the other day, but made the mistake of using something that wasn't 100% silk. No luck!! These came out beautifully, what a good use for all the old ties you never want to see your husband wear again. :-)
ReplyDeleteThese eggs are gorgous! And thanks for the easy step-by-step method.
ReplyDeleteI'll have to raid my Dad's cupboard for next Easter though - my husband doesn't do the whole wear-a-tie thing.
These are beautiful! Thanks for sharing!
ReplyDeleteThese are fabulous!! Love 'em! I've never seen this done before. very cool. I'm so glad you joined the Easter Roundup!
ReplyDeleteHappy Easter!
Linda
These are so amazing, I'm off to try it , right now.
ReplyDeleteHey just wanted to let you know I featured your eggs today :)
ReplyDeleteHappy Easter!
Linda
I saw your link over on The Magic Onions and thought I'd take a look. Yours turned out GORGEOUS!!! I'm so jealous! Mine aren't nearly as good as your but you can see them here if you are interested: http://yellowbirdyellowbeard.blogspot.com/2011/04/permission-to-enter-armory.html
ReplyDeletexoxo
Janee
yellowbirdyellowbeard.blogspot.com